ThinkPHP5.1扫码登录原理及源码详细分析
现在扫码登录是一种很常见的登录方式。当用户需要登录某个网站时,网站会提供一种扫码登录的方式,用户打开相应的手机APP,扫描网站上显示的二维码,然后在手机APP中确认登录,网站监测到用户确认登录后,跳转到登录成功页面。从这个形式上看,扫码登录就是将用户在手机APP中的登录状态同步到网站中。这篇文章就来一窥这个同步是如何发生的。
失败99次后,只要最后一次是成功的,所有的付出都是值得。毕竟失败99次后能让你感受到成功的喜悦,更重要的是在99次失败中能学习到很多。 ——心善志坚
1、运行环境
物理机:Windows11 虚拟机:Vmware Workstation15 浏览器:Edge 远程连接工具:SecureCRT8.5 FTP上传工具:FileZilla APP开发工具:HBuilderX PHP、Web开发工具:PHPStorm2022.1 接口测试工具:Postman 360免费WiFi工具创建免费网络(免去内网穿透)
说明:360免费WiFi工具,使得手机与远程服务器共处一个网络环境,使得手机扫码网页二维码显示正常;不使用360免费Wifi工具,也可以做个内网穿透实现相同的功能。
2、技术栈
Web集成运行环境:LAMP
Linux CentOS7.9 ,Apache2.4.0,MariaDB10.6 ,PHP7.4.30
PHP框架:ThinkPHP5.1.41 缓存Redis5.0.14 Workerman4.0.12 PHPSocketIO1.1.14 Vue2.0 客户端socketio2.0 Uni-app(建议最新版本)
3、流程图及登录原理
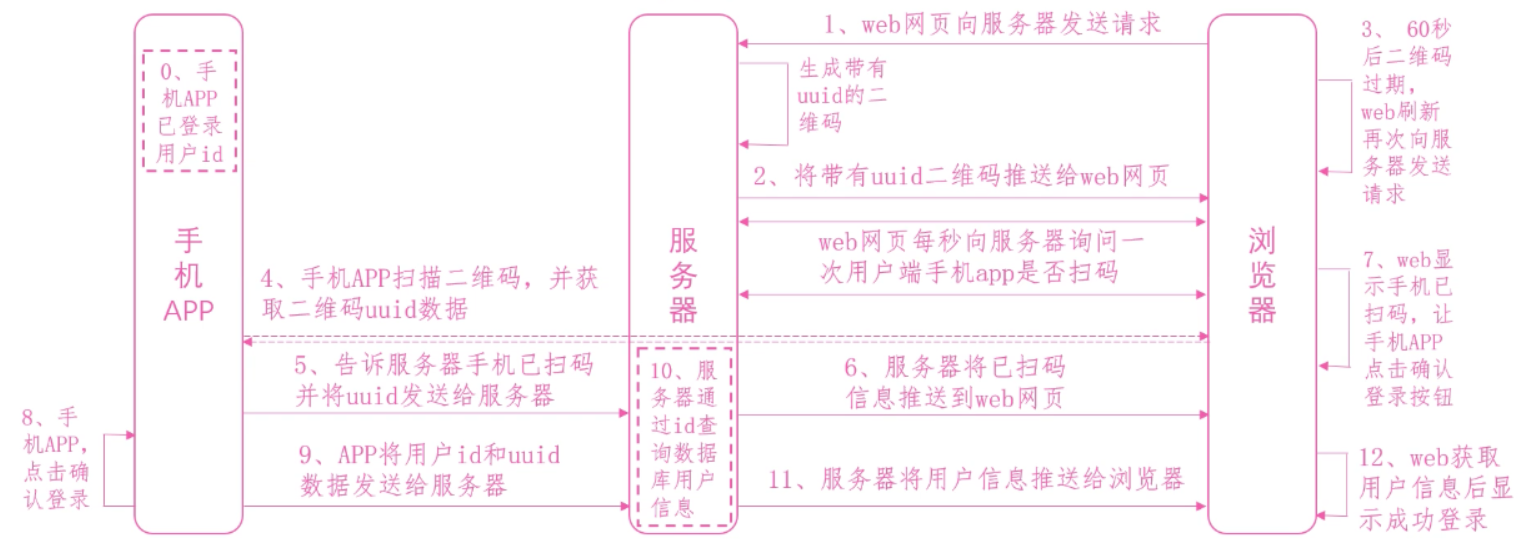 流程图
流程图原理分析
1. 用户打开网站的登录页面的时候,向浏览器的服务器发送获取登录二维码的请求。服务器收到请求后,随机生成一个uuid,将这个uuid作为key值存入redis服务器,同时设置一个过期时间,在过期后,用户登录二维码需要进行刷新重新获取。同时,将这个key值与二维码绑定在一起。然后,将二维码图片和uuid一起返回给用户浏览器。
2.浏览器拿到二维码和uuid后,会每隔一秒向浏览器发送一次,登录是否成功的请求。请求中携带有uuid作为当前页面的标识符。
3.浏览器拿到二维码后,将二维码展示到网页上,并给用户一个提示:请掏出您的手机,打开手机APP进行登录。用户拿出手机APP扫描二维码,就可以得到一个验证信息和一个uuid。由于手机端已经登录过,在访问服务端的时候,参数中都回携带一个用户的token,服务端可以从中解析到用户的id(这里从token中取值而不是手机端直接传用户id是为了安全,直接传用户id可能会被截获和修改,token是加密的,被修改的风险很小)。手机端将解析到的数据和用户token一起作为参数,向服务器发送验证登录请求。服务器收到请求后,首先对比参数中的验证信息,确定是否为用户登录请求接口。如果是,返回一个确认登录信息给手机端。
4.手机端收到返回后,将登录确认框显示给用户(防止用户误操作,同时使登录更加人性化)。用户确认登录操作后,手机再次发送请求。服务器拿到用户id和uuid后,将用户的id作为value值存入redis中以uuid作为key的键值对中。
5.浏览器再次发送请求的时候,服务器通过手机端传送的用户id查询数据库获取用户信息,将用户信息返回给浏览器,浏览器登录成功,同时手机端显示登录信息。
4、实际登录案例视频
5、服务端目录及源码
├── application         #应用目录
│   └── common          #公共模块目录
│   │   └── utils
│   │       └── MyRedis.php   #封装了php扩展的redis
│   │       └── Tool.php   #封装实现二维码及uuid工具类
│   └── index  #index应用模块
│       └── controller  #控制器目录
│       │   └── Index.php
│       │   └── Login.php
│       │   └── SweepStatus.php
│       └── view  #视图目录
│       │   └── index
│       │       └── index.html
│       │       └── page.html
│       └── build.php
│       └── command.php
│       └── provider.php
│       └── tags.php
│
├── config
│   └── index
│   │   └── template.php  #index模块配置
│   └── app.php
│   └── cache.php
│   └── console.php
│   └── cookie.php
│   └── database.php #数据库配置
│   └── log.php
│   └── middleware.php
│   └── session.php
│   └── template.php
│   └── trace.php
├── extend
├── public
│   └── static
│   │    └── index
│   │        └── img
│   │        └── js
│   │        └── css
│   └── .htaccess
│   └── favicon.ico
│   └── index.php
│   └── robots.txt
│   └── router.php
├── route #路由配置文件
│   └── route.php
├── runtime
├── thinkphp #thinkphp5.1.41框架
├── vendor #composer安装包存放位置
│   └── bacon
│   └── brick
│   └── composer
│   └── dasprid
│   └── endroid  #二维码安装包
│   └── ramsey #uuid安装包
│   └── symfony
│   └── topthink
│   └── workerman  #wokerman安装包
│   └── autoload.php
├── build.php
├── composer.json
├── composer.lock
├── start.php #PHPsocketIO服务启动文件
└── think
6、项目源码分析
common目录文件
MyRedis.php具体源码如下:
<?php

namespace app\common\utils;

class MyRedis
{
    private static $redis = null;
    private static $expire = 3600; //默认存储时间(秒)
    private static $host = '127.0.0.1';
    private static $port = '6379';
    private static $password = '';
    private static $db = 0;
    private static $timeout = 10;

    public function __construct($config=[])
    {
        //设置php脚本执行时间
        set_time_limit(0);
        //设置socket连接超时时间
        ini_set('default_socket_timeout', -1);
        if($config && is_array($config)){
            self::config($config);
        }
        if(self::$redis==null){
            self::$redis = new \Redis();
        }
        self::$redis->connect(self::$host,self::$port,self::$timeout) or die('Redis 连接失败!');
        if(!empty(self::$password)){
            //如果有设置密码,则需要连接密码
            self::$redis->auth(self::$password);
        }
        if((int)self::$db){
            //选择缓存库
            self::$redis->select(self::$db);
        }
    }
    /**
     * 加载配置参数
     * @param  array  $config 配置数组
     */
    private static function config(array $config=[])
    {
        self::$host = isset($config['host']) ? $config['host'] : '127.0.0.1';
        self::$port = isset($config['port']) ? $config['port'] : '6379';
        self::$password = isset($config['password']) ? $config['password'] : '';
        self::$db = isset($config['db']) ? $config['db'] : '';
        self::$expire = isset($config['expire']) ? $config['expire'] : 3600;
        self::$timeout = isset($config['timeout']) ? $config['timeout'] : 10;
    }

    public static function set($key, $value, $expire=60)
    {
        if(is_int($key) || is_string($key)){
            $value = is_int($value) ? $value : serialize($value);
            $expire = (int)$expire ? $expire : self::$expire;
            if(self::$redis->set($key, $value) && self::$redis->expire($key, $expire)){
                return true;
            }
            return false;
        }
        return false;
    }
    /**
     * 获取键值
     * @param string or int $key 键名
     * @return mix 返回值
     */
    public static function get($key)
    {
        $value = self::$redis->get($key);
        if(is_object($value)){
            return $value;
        }
        return is_numeric($value) ? $value : unserialize($value);
    }
    /**
     * 删除一个键值
     * @param  string or int $key 键名
     * @return int 成功返回1 ,失败或不存在键返回0
     */
    public static function del($key)
    {
        return self::$redis->del($key);
    }
}
Tool.php工具类源码具体如下:
<?php

namespace app\common\utils;

use Ramsey\Uuid\Uuid;
use Endroid\QrCode\Builder\Builder;
use Endroid\QrCode\Encoding\Encoding;
use Endroid\QrCode\ErrorCorrectionLevel\ErrorCorrectionLevelHigh;
use Endroid\QrCode\RoundBlockSizeMode\RoundBlockSizeModeMargin;
use Endroid\QrCode\Writer\PngWriter;

class Tool
{
    public function randomNumber()
    {
        $uuid = Uuid::uuid4();
        return $uuid->toString();
    }
    public function getcode($data)
    {
        $result = Builder::create()
            ->writer(new PngWriter())
            ->writerOptions([])
            ->data($data)
            ->encoding(new Encoding('UTF-8'))
            ->errorCorrectionLevel(new ErrorCorrectionLevelHigh())
            ->size(300)
            ->margin(10)
            ->roundBlockSizeMode(new RoundBlockSizeModeMargin())
            ->build();
        $qrCode = $result->getString();
        return 'data:image/png;base64,' . chunk_split(base64_encode($qrCode));
    }
}
模块目录文件
controller控制器中Index.php具体源码如下:
<?php

namespace app\index\controller;

use think\Controller;

class Index extends Controller
{
    public function index()
    {
        return $this->fetch();
    }
    public function page()
    {
        return $this->fetch();
    }
}
controller控制器中Login.php具体源码如下:
<?php

namespace app\index\controller;

use think\Controller;
use think\facade\Request;
use app\common\utils\MyRedis;

class Login extends Controller
{
    public function index()
    {
        $redis = new MyRedis();
        $userids = Request::param();
        $RedisUid = $redis::get($userids['uuid']);
        if($RedisUid){
            return json([
                'status' => 404,
                'msg'    => '已登录,请勿重复扫码',
                'data'   => $RedisUid
            ]);
        }else{
            $userInfo = db('user')->where('id',$userids['uid'])->find();
            $redis::set($userids['uuid'],json_encode($userInfo));
            return json([
                'status' => 200,
                'msg'    => '扫码成功',
                'data'   =>  $redis::get($userids['uuid'])
            ]);
        }
    }
}
controller控制器中SweepStatus.php具体源码如下:
<?php

namespace app\index\controller;

use think\Controller;
use think\facade\Request;
use app\common\utils\MyRedis;

class SweepStatus extends Controller
{
    public function index()
    {
        $redis = new MyRedis();
        $uuid = Request::param();
        $redis::set('scanCodeMark',implode($uuid));
        return json([
            'status' => 200,
            'msg'    => '发送成功',
            'data'   => $uuid
        ]);
    }
}
view/index视图中index.html具体源码如下:
<!DOCTYPE html>
<html lang="zh-CN">
 <head>
  <meta charset="UTF-8">
  <title>技术藤-APP扫码登录</title>
  <script src="__INDEX__/js/vue.js"></script>
  <script src="__INDEX__/js/socket.io.js"></script>
  <link rel="stylesheet" href="__INDEX__/css/index.css">
  <script src="__INDEX__/js/index.js"></script>
  <style>
         body{
          margin:0;
             background:url("__INDEX__/img/bg.png") no-repeat;
             background-size:cover;
                background-attachment:fixed;
                position: absolute;
         }
   #app {
    width: 460px;
    height: 560px;
    box-shadow: 0px 0px 2px 2px rgba(242,92,173,0.3);
    border-radius: 10px;
    background-color: white;
    position: relative;
    left:210%;
    top: 60px;
   }
            .right{
             position: relative;
             margin-top: 100px;
             left:224%;
             color: #666;
            }
   .title {
    margin-top: 10px;
   }
   .QRcode {
    margin-top: 20px;
    width: 240px;
    height: 240px;
    position: relative;
   }
   .QRcode_overtime {
    display: flex;
    align-items: center;
    justify-content: center;
    flex-direction: column;
    position: absolute;
    width: 100%;
    height: 100%;
    left: 0;
    top: 0;
    background: rgba(0, 0, 0, 0.68);
    color: #fff;
    text-align: center;
    z-index: 2;
    font-size: 18px;
    cursor: pointer;
   }
   .QRcode_overtime img {
    width: 40px;
    height: 40px;
    margin-top: 15px;
   }
   .QRcode_success {
    display: flex;
    align-items: center;
    justify-content: center;
    flex-direction: column;
    position: absolute;
    width: 100%;
    height: 100%;
    left: 0;
    top: 0;
    background: rgba(0, 0, 0, 0.68);
    color: #fff;
    text-align: center;
    z-index: 3;
    font-size: 18px;
   }
   .QRcode_success img {
    width: 40px;
    height: 40px;
    margin-bottom: 15px;
   }
   .QRcode_img {
    width: 100%;
    height: 100%;
    position: absolute;
    z-index: 1;
    left: 0;
    top: 0;
   }
   .info {
    color: #F25CAD;
    margin-top: 10px;
   }
   .tips {
    margin-top: 20px;
    background: #F25CAD;
    border-radius: 24px;
    padding: 4px 14px;
    font-size: 13px;
    color: #fff;
   }
   #tab-ScanCode{
    text-align: right;
    color: #F25CAD;
    font-size: 17px;
   }
      div.el-tabs__active-bar{
                background-color: #F25CAD;
                width: 300px;
  }
  </style>
 </head>
 <body>
  <div id="app">
   <img src='__INDEX__/img/logo.png' alt='技术藤网站logo' width="48px"></img>
   <el-tabs v-model="activeName" @tab-click="handleClick">
    <el-tab-pane label="" name="ScanCode" style="font-size:20px">
     <div class="QRcode">
      <div class="QRcode_success" v-if="successShow">
       <img src="__INDEX__/img/success.png" alt="success">
       <p>扫码成功</p>
      </div>
      <div class="QRcode_overtime" @click="AgainScanCode" v-if="overtimeShow">
       <p>二维码失效,点击重新获取</p>
       <img src="__INDEX__/img/reload.png" alt="reload.png">
      </div>
      <img class="QRcode_img" :src="base64QRcode.QRcode">
     </div>
     <p class="tips">{{ tipsText }}</p>
    </el-tab-pane>
   </el-tabs>
   <div>
    <p style="color:#666;font-family:'微软雅黑'">
                    点击<a href="">技术藤APP</a>下载扫码
                </p>
    <p style="color:#666;font-family:'微软雅黑'">搜索微信小程序
                    <a href="https://www.jishuteng.com">技术藤</a>扫码
                </p>
   </div>
  </div>
        <div class="right">©2016-2022
            <a href="https://www.jishuteng.com">技术藤</a>版权所有湘ICP备16010809号
       </div>
 </body>
 <script>
  var app = new Vue({
   el: '#app',
   data: {
    socket: null,
    socketURL: 'http://192.168.116.156:2022', // socket 服务的地址
    base64QRcode: '', // 保存后端二维码和uuid
    timerCheck: null,
    tipsText: '技术藤', // 扫码时提示文字
    overtimeShow: false, // 是否显示二维码失效
    successShow: false, // 是否显示扫码成功
    ScanCodeShow: false,
   },
   created() {
    // 创建 Socket 链接
    this.socket = io.connect(this.socketURL);
    this.handleClick();
   },
   methods: {
    handleClick() {
     this.getQRcode();
     this.ScanCodeOvertime();
     this.ScanCodeing();
    },
    getQRcode() {
     // 获取服务器uuid和二维码
     this.socket.emit('getQRcode');
     this.sendQRcode();
    },
    // 接受服务器uuid和二维码
    sendQRcode() {
     this.socket.on('sendQRcode', res => this.base64QRcode = res);
     this.checkScanCode();
    },
    checkScanCode() {
     // 等待用户扫码
     this.socket.on('waitScanCode', res => {
      if (!this.ScanCodeShow) {
       this.tipsText = '等待用户扫码'
      }
     });
     // 扫码成功
     this.socket.on('SuccessScanCode', (res) => {
      localStorage.setItem("nickname", JSON.parse(res).nickname);
      localStorage.setItem("avatar", JSON.parse(res).avatar);
      this.tipsText = '用户信息为:'+localStorage.getItem("nickname");
      this.successShow = true; // 显示扫码成功的样式
      clearInterval(this.timerCheck); // 扫码成功,清除定时器,不再询问服务器
      setTimeout(function(){
                       window.open('__URL__/index/index/page.html','');
      },2000);
     });
     console.log(this.base64QRcode);
     // 每秒询问一次服务器,手机APP端是否扫码
     this.timerCheck = setInterval(() => this.socket.emit("checkScanCode", this.base64QRcode.uuid),
      1000);
    },
    // 如果二维码超时
    ScanCodeOvertime() {
     this.socket.on('ScanCodeOvertime', () => {
      if (!this.successShow) {
       clearInterval(this.timerCheck); // 二维码失效,不再询问服务器
       this.overtimeShow = true; // 显示二维码失效的样式
       this.tipsText = "二维码失效"; // 清空等待扫码文字
      }
     })
    },
    // 已扫码但未确认
    ScanCodeing() {
     this.socket.on('ScanCodeing', () => {
      this.ScanCodeShow = true;
      this.tipsText = "您已扫码,请在手机上确认登录!"
     })
    },
    // 二维码失效后,重新获取二维码的事件
    AgainScanCode() {
     this.overtimeShow = false;
     this.ScanCodeShow = false;
     this.socket.emit('getQRcode');
     this.sendQRcode();
    }
   }
  })
 </script>
</html>
view/index视图中page.html具体源码如下:
<!DOCTYPE html>
<html>
 <head>
  <meta charset="utf-8">
  <title>技术藤-登录页面</title>
  <style type="text/css">
   *{
    margin: 0;
    padding: 0;
    background-color:#eee ;
   }
   #main{
    width: 100%;
    height: 100%;
    position: absolute;
   }
   #title{
            text-align: center;
            font-size: 20px;
            font-family: 微软雅黑;
            position: relative;
            top: 40px;
            left: 0px;
   }
   #avatar{
    width:96px;
    height:96px;
    border-radius:48px;
    position: relative;
    top: 60px;
                left: 250px;
   }
   #nickname{
    color: #303841;
    text-align: center;
    font-size: 18px;
    text-align: center;
                position: relative;
                top: 80px;
   }
  </style>
 </head>
 <body>
  <div id="main">
   <div id="title"></div>
   <img id="avatar"/>
   <div id="nickname"></div>
  </div>
  <script type="text/javascript">
   var nickname = localStorage.getItem("nickname");
   var avatar   = localStorage.getItem("avatar");
   if(nickname){
    document.getElementById('nickname').innerHTML= nickname;
   }else{
    document.getElementById('nickname').innerHTML="扫码登录";
   }
   if(avatar){
    document.getElementById("avatar").setAttribute("src",avatar);
   }else{
    document.getElementById("avatar").setAttribute("src","");
   }
   if(nickname && avatar){
    document.getElementById('title').innerHTML= "成功登录后的头像和昵称";
   }else{
    document.getElementById('title').innerHTML= "扫码登录后会显示头像和昵称";
   }
  </script>
 </body>
</html>
config目录源码分析
config/index视图中template.php具体源码如下:
<?php
  return [
      'tpl_replace_string'  =>  [
          '__INDEX__'=>'http://192.168.116.156/scancode/public/static/index'
      ]
  ];
?>
config视图中database.php具体源码如下:
<?php
  return [
      // 数据库类型
      'type'            => 'mysql',
      // 服务器地址
      'hostname'        => '127.0.0.1',
      // 数据库名
      'database'        => 'scancode',
      // 用户名
      'username'        => 'root',
      // 密码
      'password'        => '自己数据库密码',
      // 端口
      'hostport'        => '3306',
      // 数据库编码默认采用utf8
      'charset'         => 'utf8',
      // 数据库表前缀
      'prefix'          => 'scancode_',
      // 是否需要断线重连
      'break_reconnect' => true,
  ];
?>
vendor目录
需要用comopser安装uuid&&二维码&&PHPsocketIO安装包
说明:安装PHPSocketIO包时会自动安装workerman,具体安装步骤如下:
composer require endroid/qr-code   ##二维码安装包
composer require ramsey/uuid       #uuid安装包
composer require workerman/phpsocket.io  #workerman&phpsocketio安装包
7、start.php源码分析
<?PHP

use PHPSocketIO\SocketIO;
use Workerman\Worker;
use app\common\utils\Tool;
use app\common\utils\MyRedis;
use Workerman\Lib\Timer;

require_once __DIR__ .'/vendor/autoload.php';

// socketIO监听client2022端口
$io = new SocketIO(2022);
// socketIO监听客户端有连接时触发
$io->on('connection', function ($socket) use ($io) {
    $socket->on('getQRcode',function ()use($io){
        $tool = new Tool();
        $uuid = $tool->randomNumber();
        // 根据uuid生成二维码的base64
        $qrcode = $tool->getcode($uuid);
        $redis = new MyRedis();
        // 保存uuid 到redis中,用户数据留空,用来存储用户信息
        $redis::set($uuid,'');
        $base64UuidData['uuid'] =  $uuid;
        $base64UuidData['QRcode'] = $qrcode;
        // 向web端发送uuid和二维码base64数据
        $io->emit('sendQRcode',$base64UuidData);
    });

    /**
     * 检查手机APP用户是否扫码,如果redis获取到用户信息,表示已扫码
     * 同时浏览器web端不在询问服务端,服务端并将用户信息推送给浏览器
     */
     $socket->on('checkScanCode',function ($key)use($io){
         $redis = new MyRedis();
         $userInfo = $redis::get($key);
         if(empty($userInfo)){
             echo PHP_EOL.'Web端询问用户是否扫码:'.$key;
             $io->emit("waitScanCode");
         }else{
             $io->emit("SuccessScanCode", $userInfo);
             $redis::del($key);
         }
     });
    //workerman定时器每60秒向浏览器发送二维码过期信息
    Timer::add(60,function ()use($io){
        $io->emit('ScanCodeOvertime');
    });
   //workerman定时器每秒检查手机APP用户是否扫码
    Timer::add(1,function ()use($io){
        $redis = new MyRedis();
        $scanCodeMark = $redis::get('scanCodeMark');
        if($scanCodeMark){
            $io->emit("ScanCodeing", $scanCodeMark);
            echo PHP_EOL."已扫码,请在手机上确认登录";
            $redis::del('scanCodeMark');
        }
    });
   //socket监听浏览器是否刷新掉线
    $socket->on('disconnect', function (){
        echo PHP_EOL.'web端用户掉线...';
    });
});

Worker::runAll();
8、Web端效果图
效果预览
扫码页面初始化状态 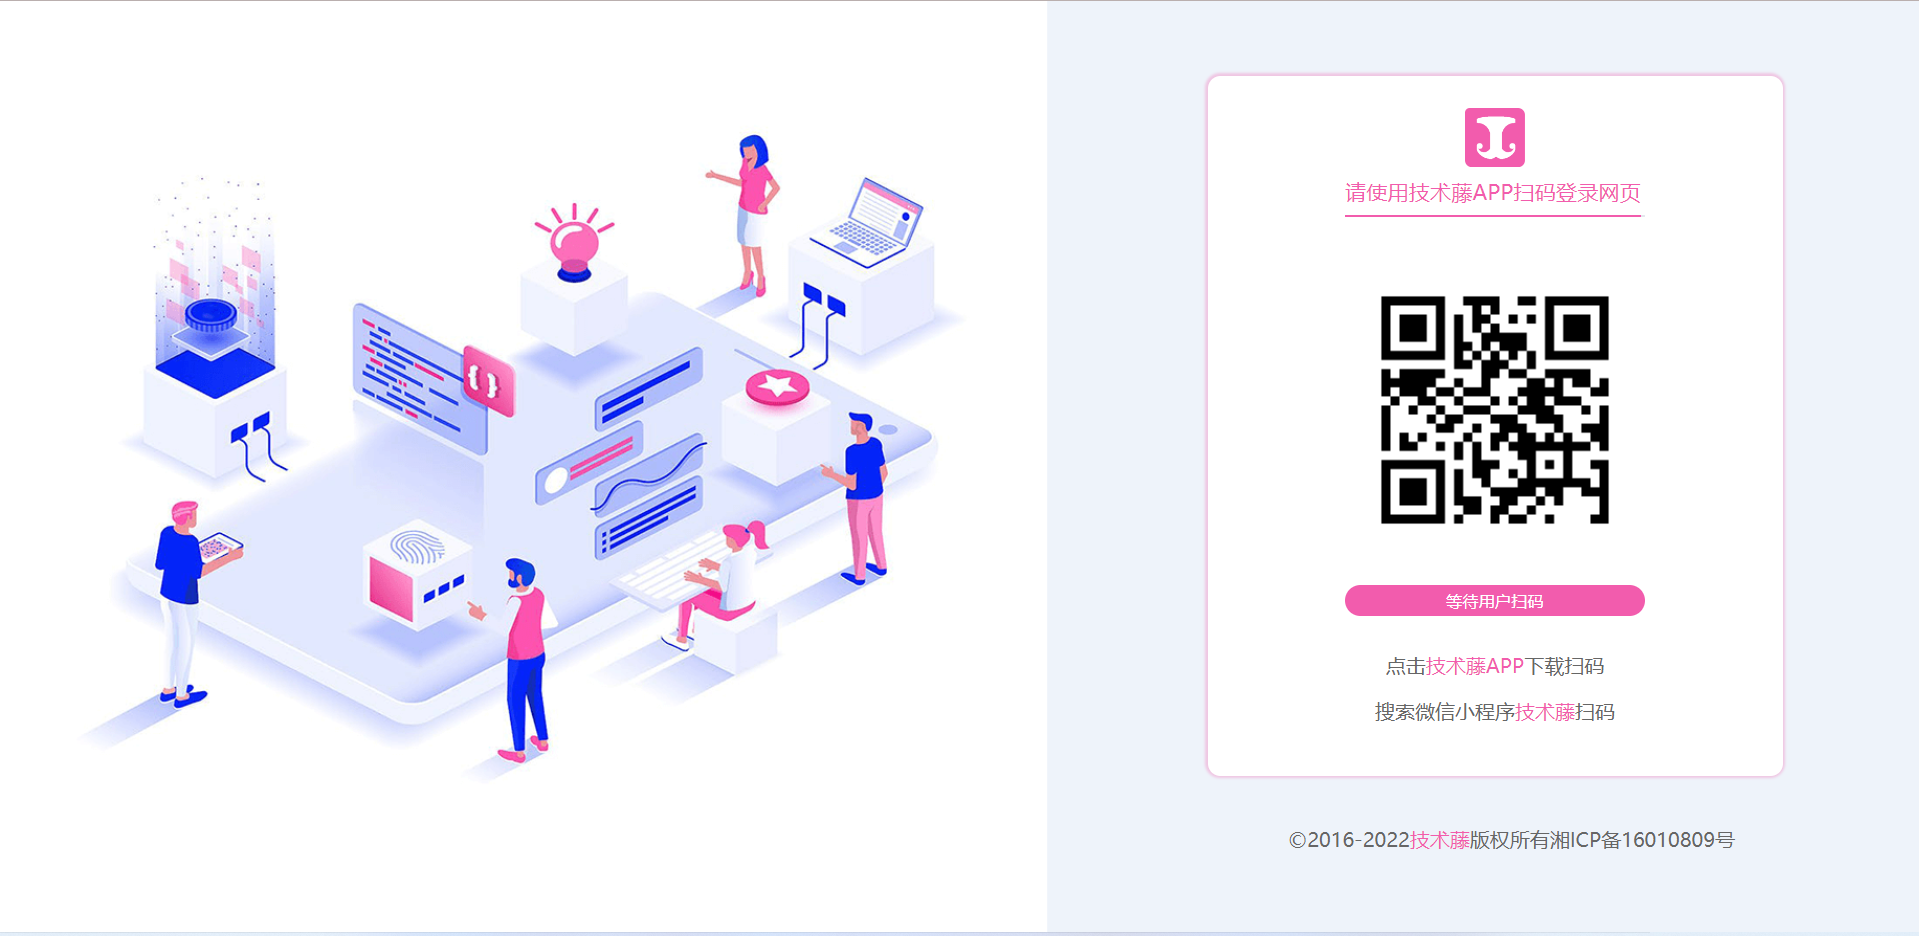 未扫码前的状态
 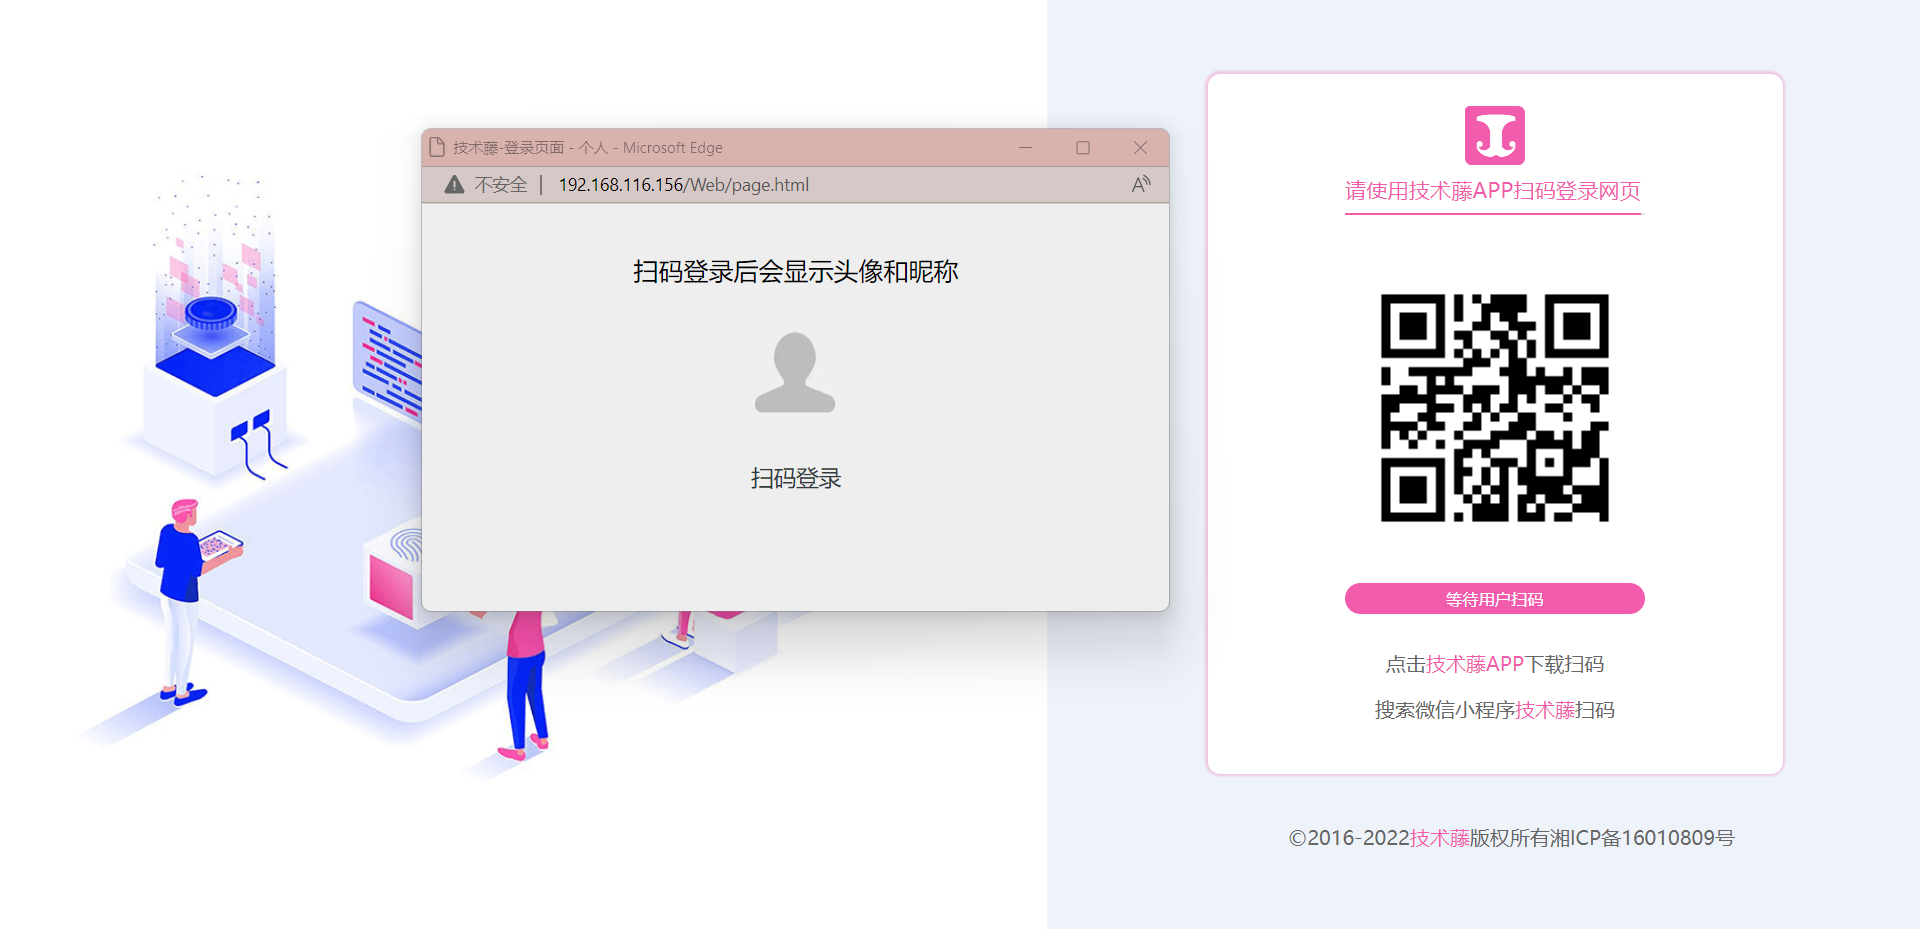 二维码失效状态
 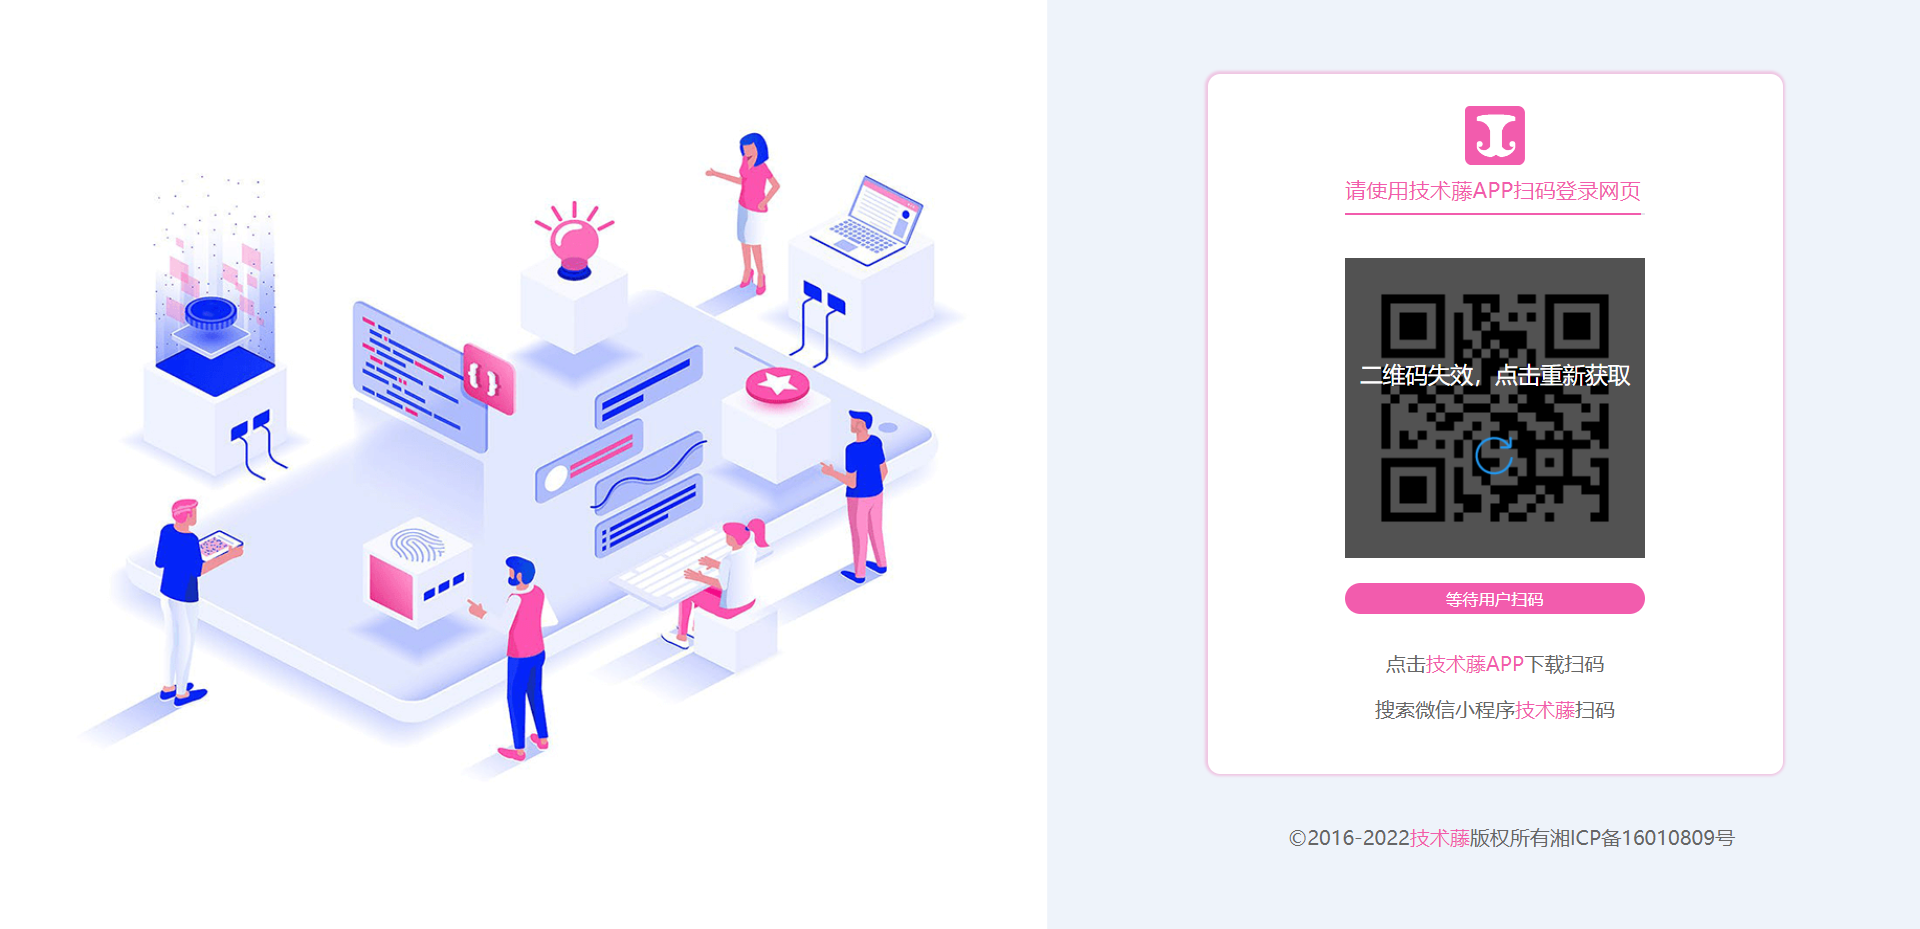 扫描二维码未确认状态
 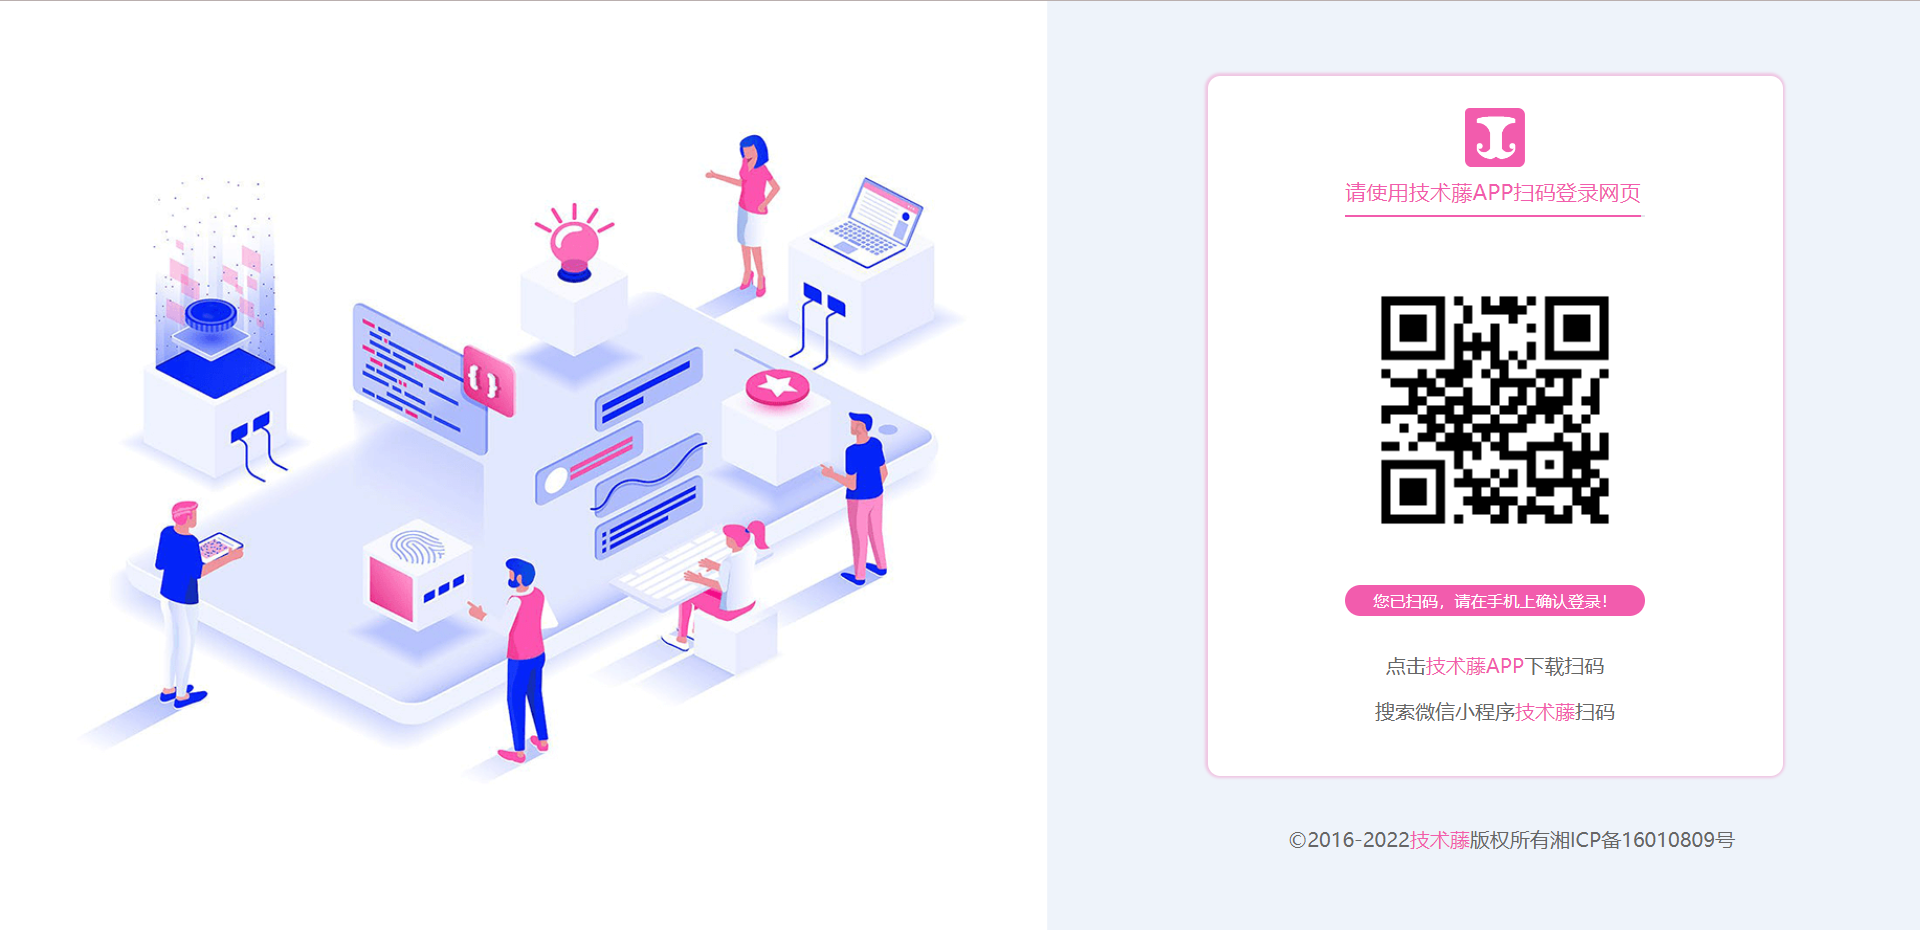 扫码成功状态
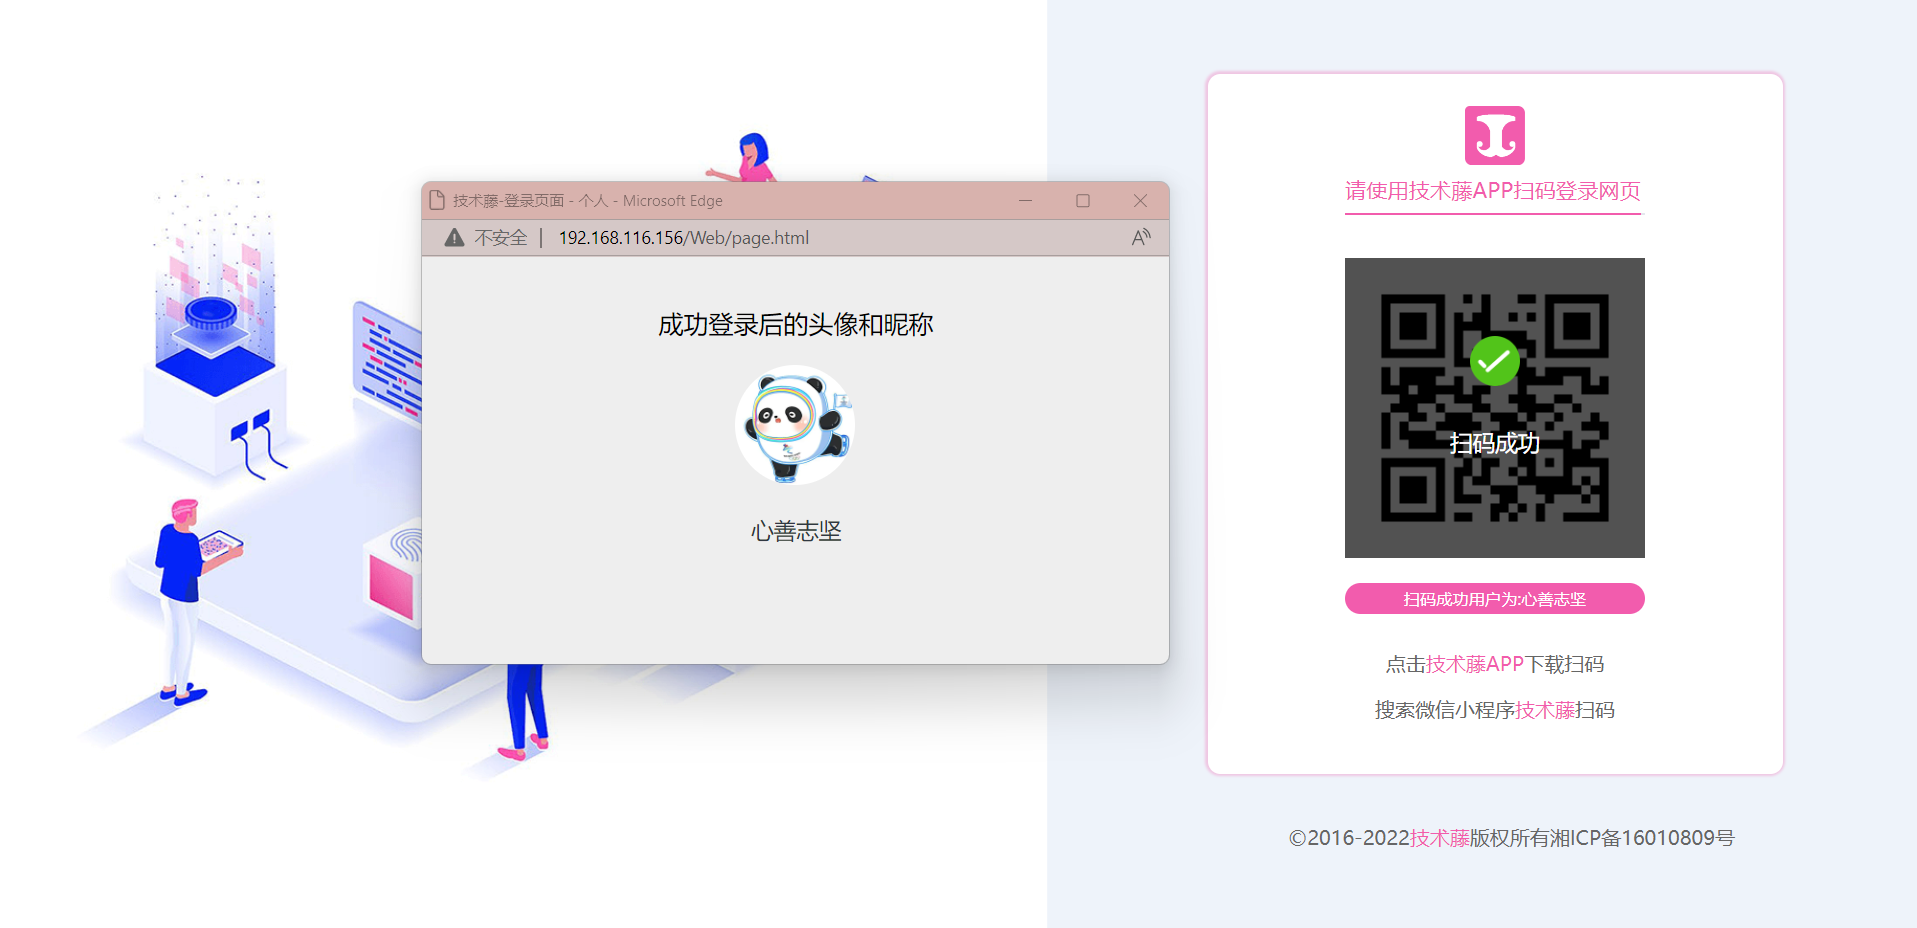
9、移动端uni-app效果图
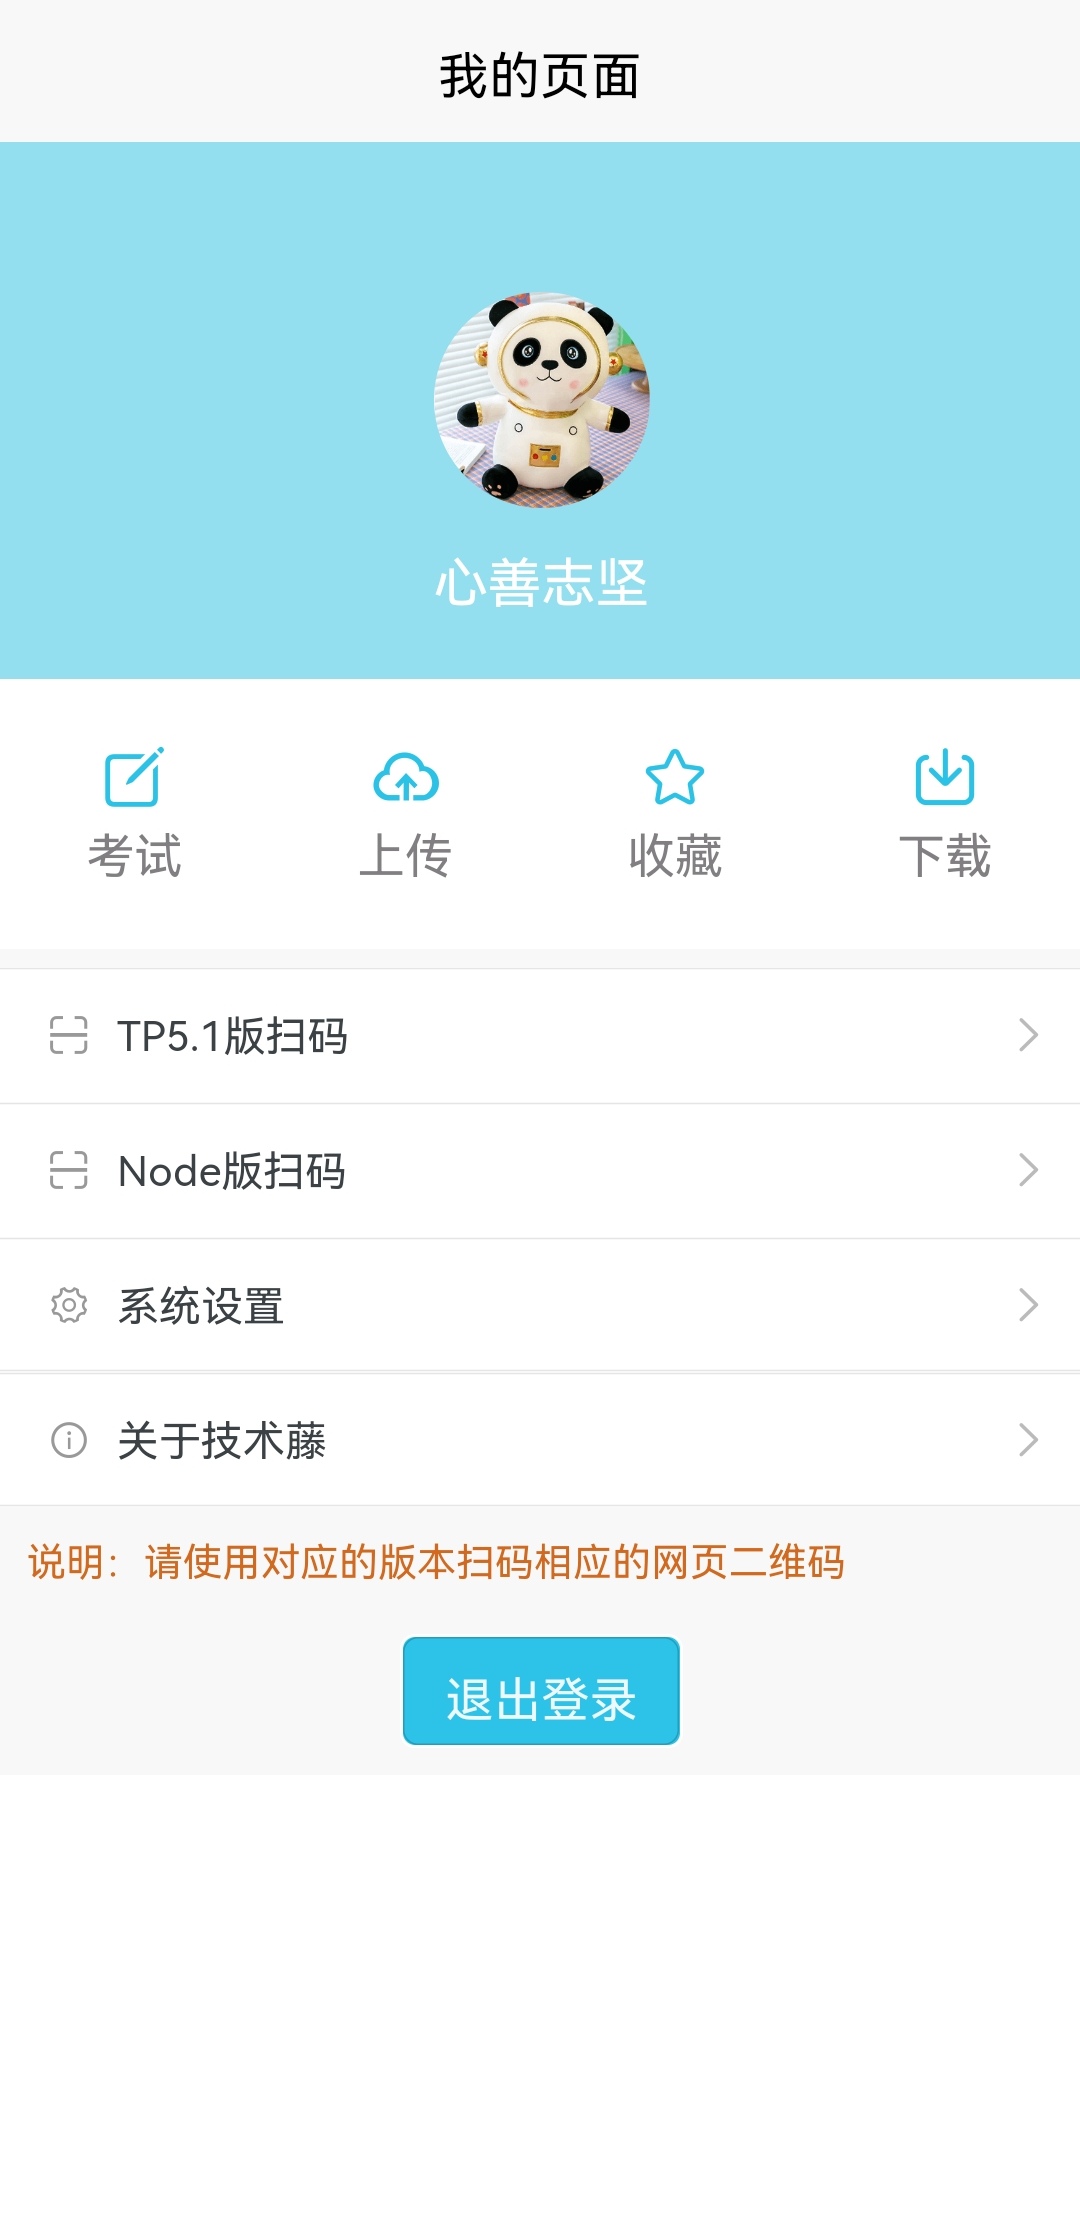 图1 图1 | 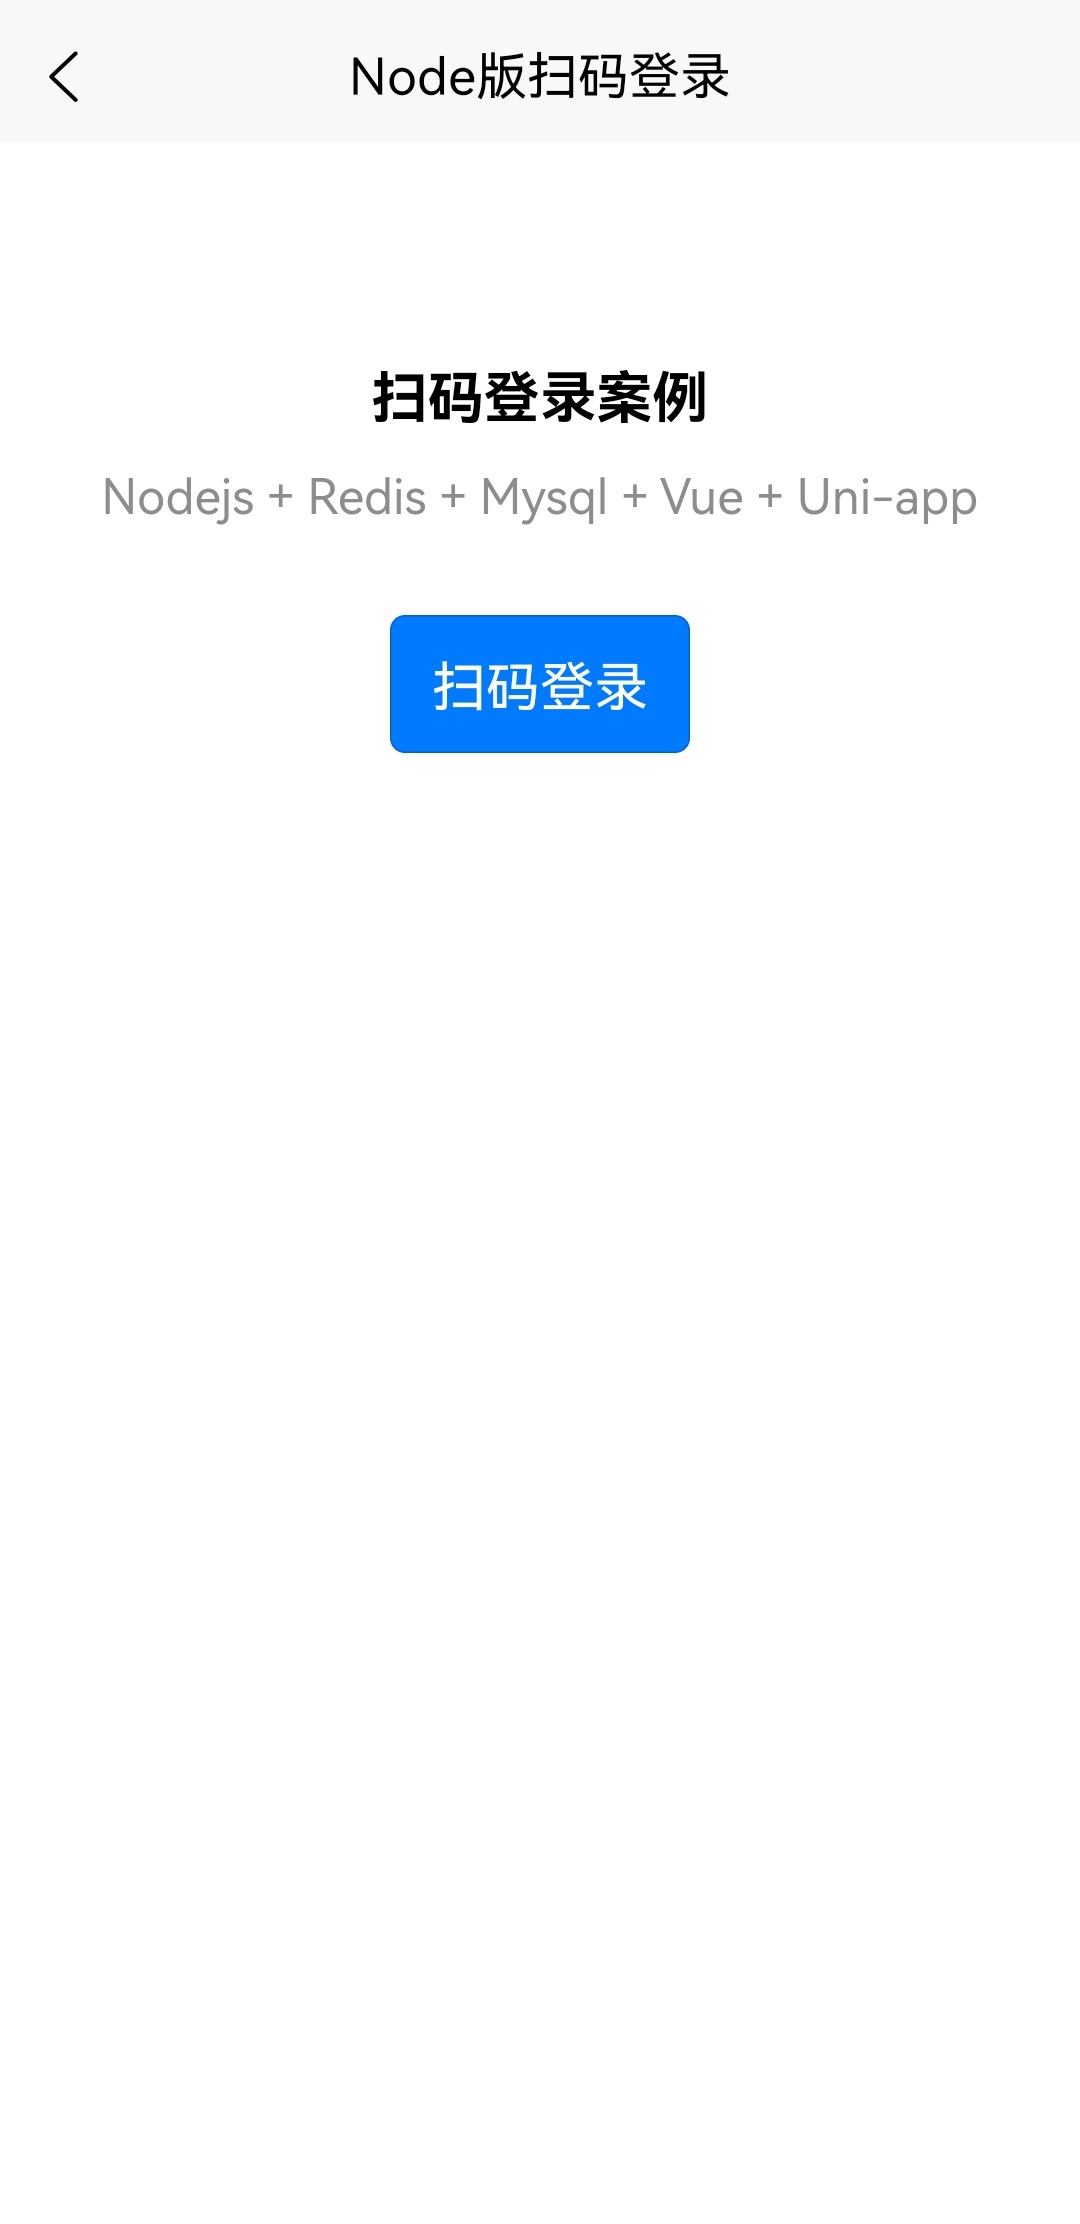 图2 图2 | 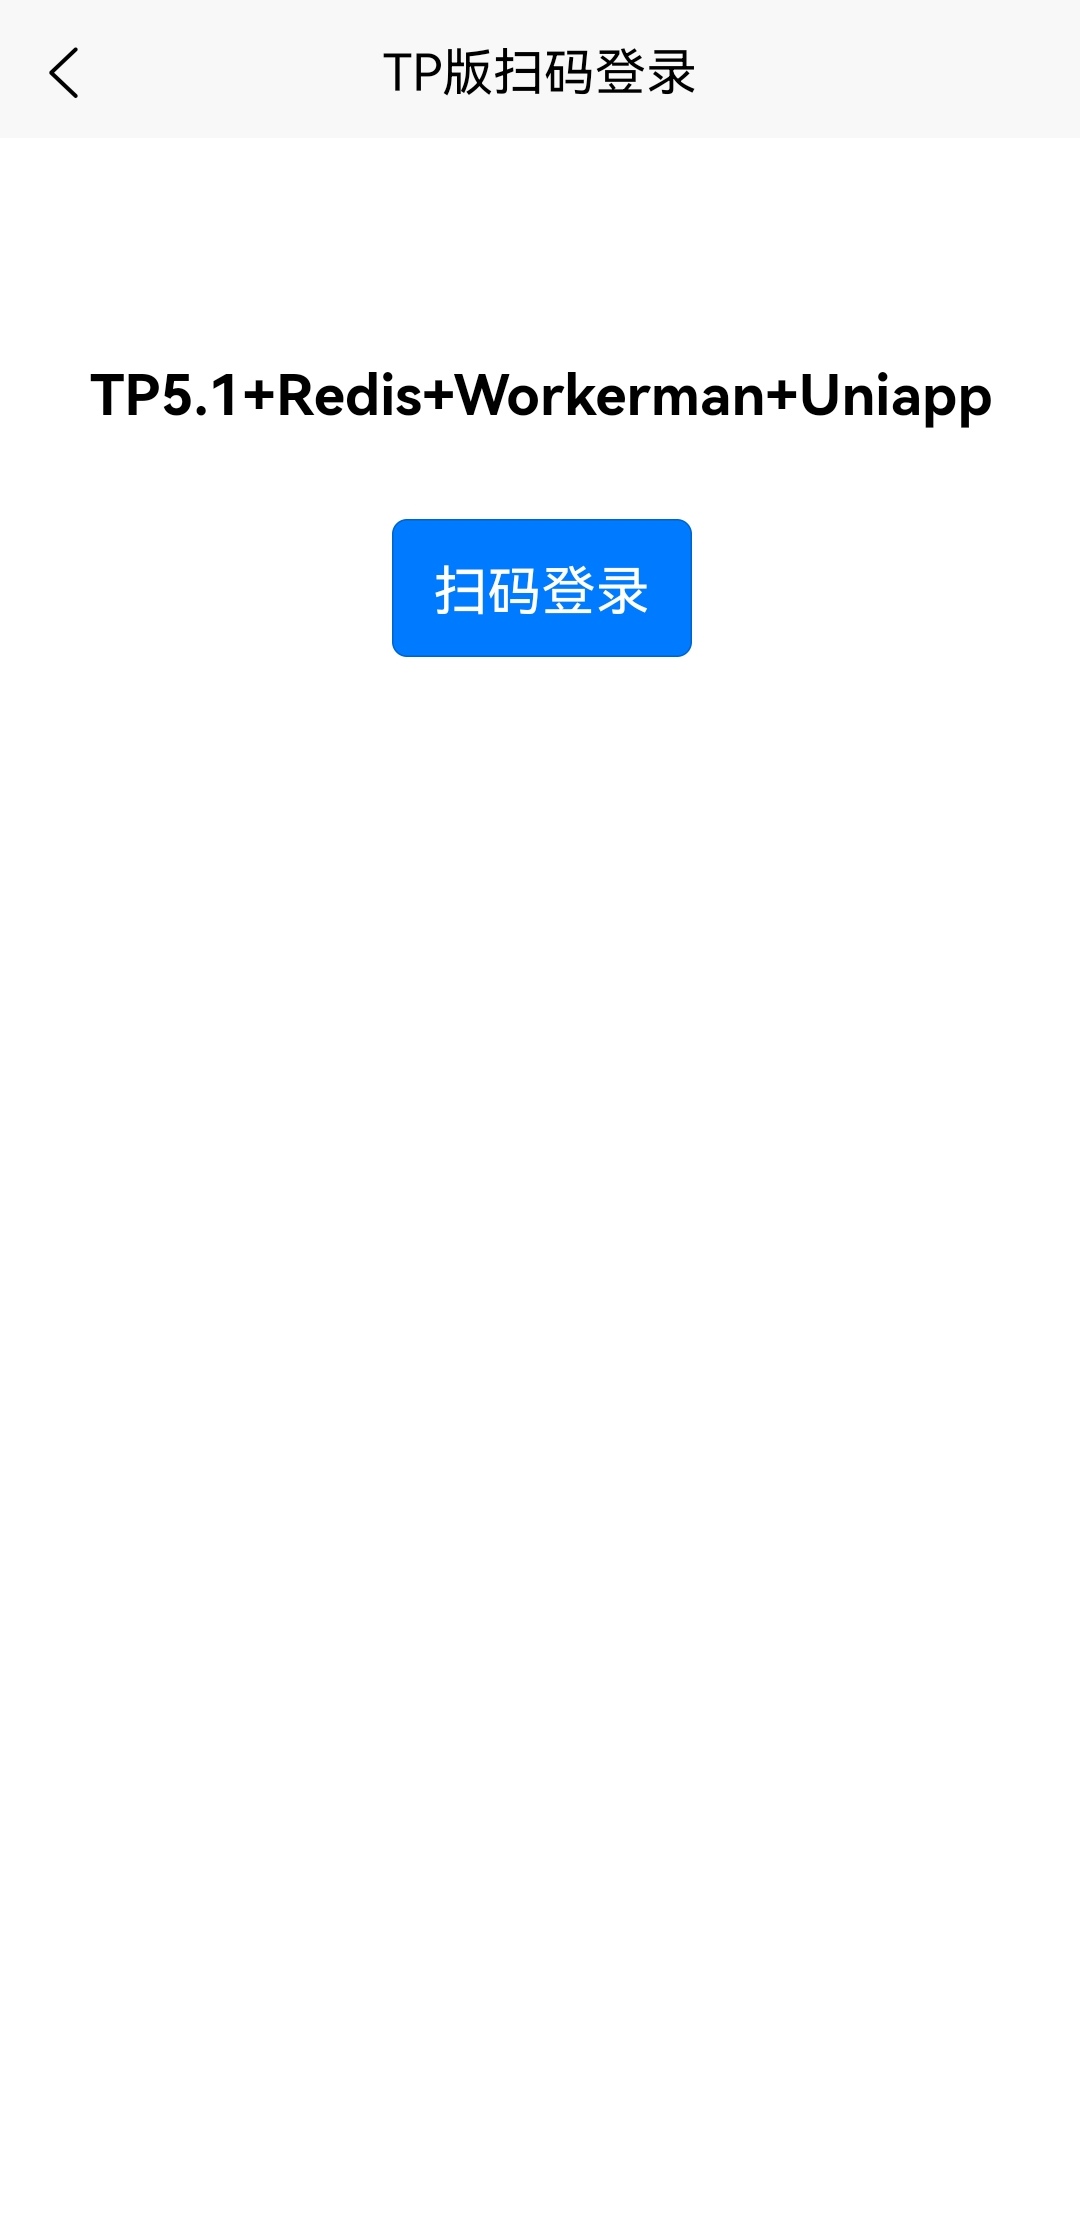 图3 图3 |
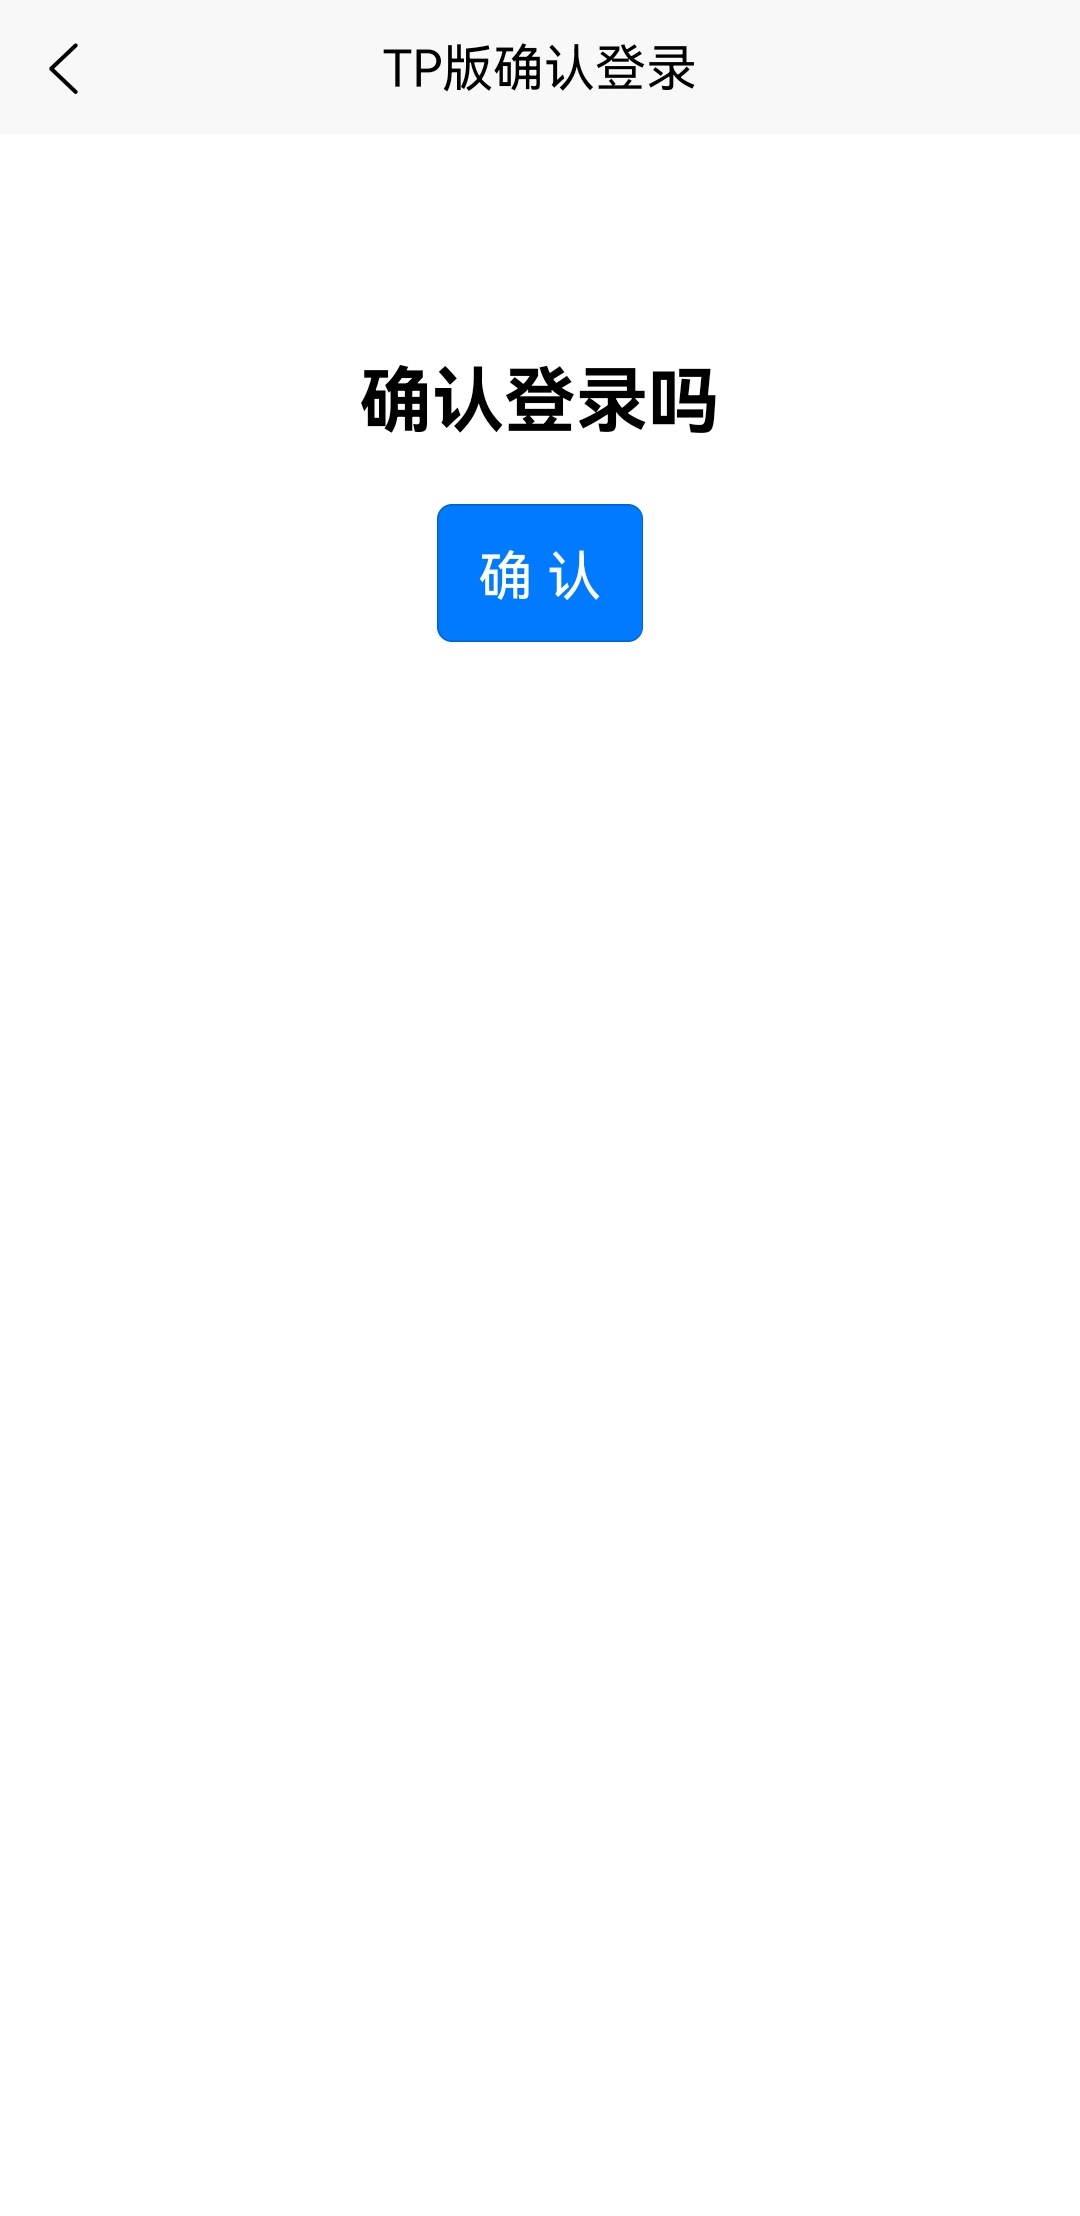 图4 图4 | 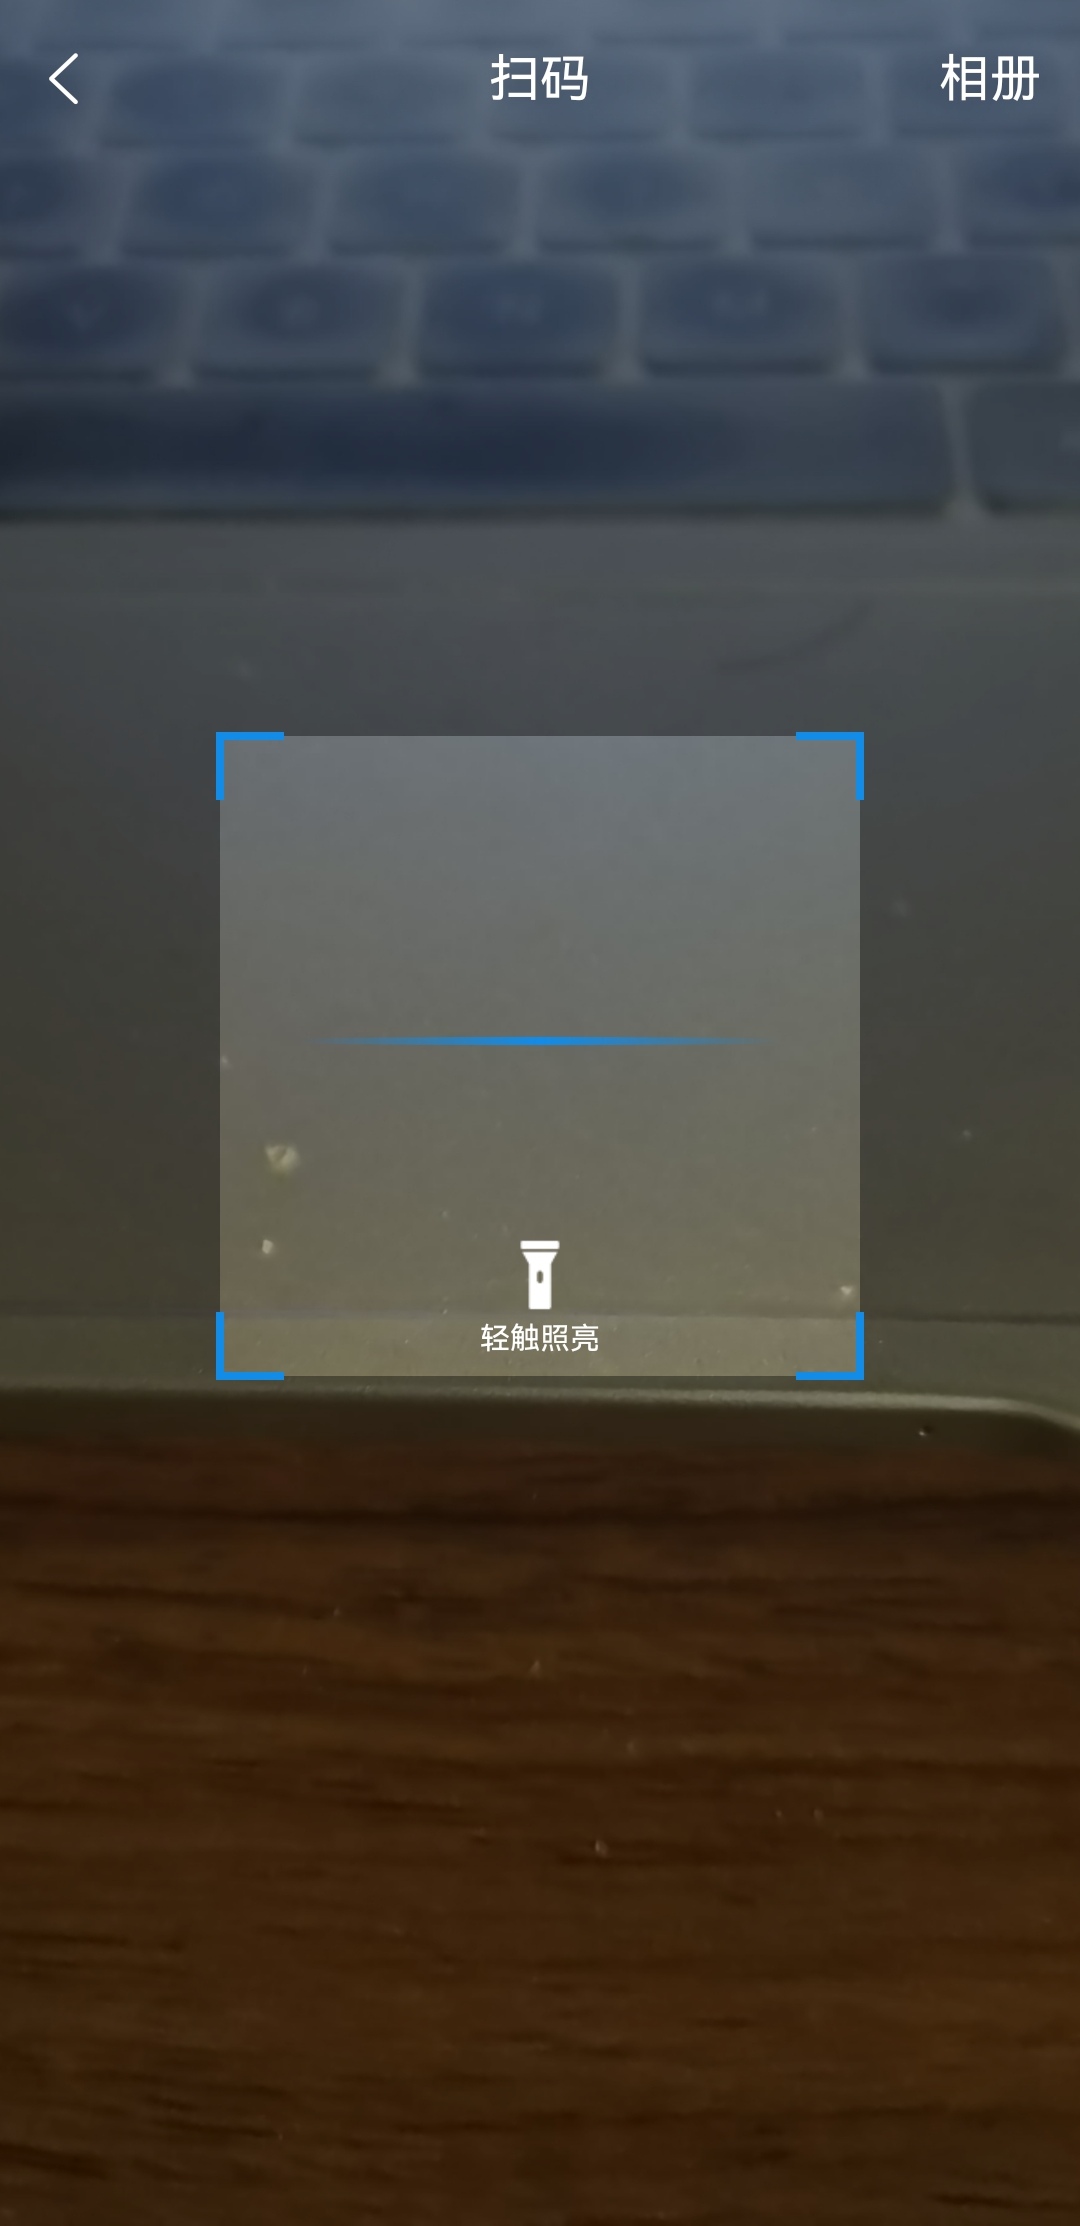 图5 图5 | 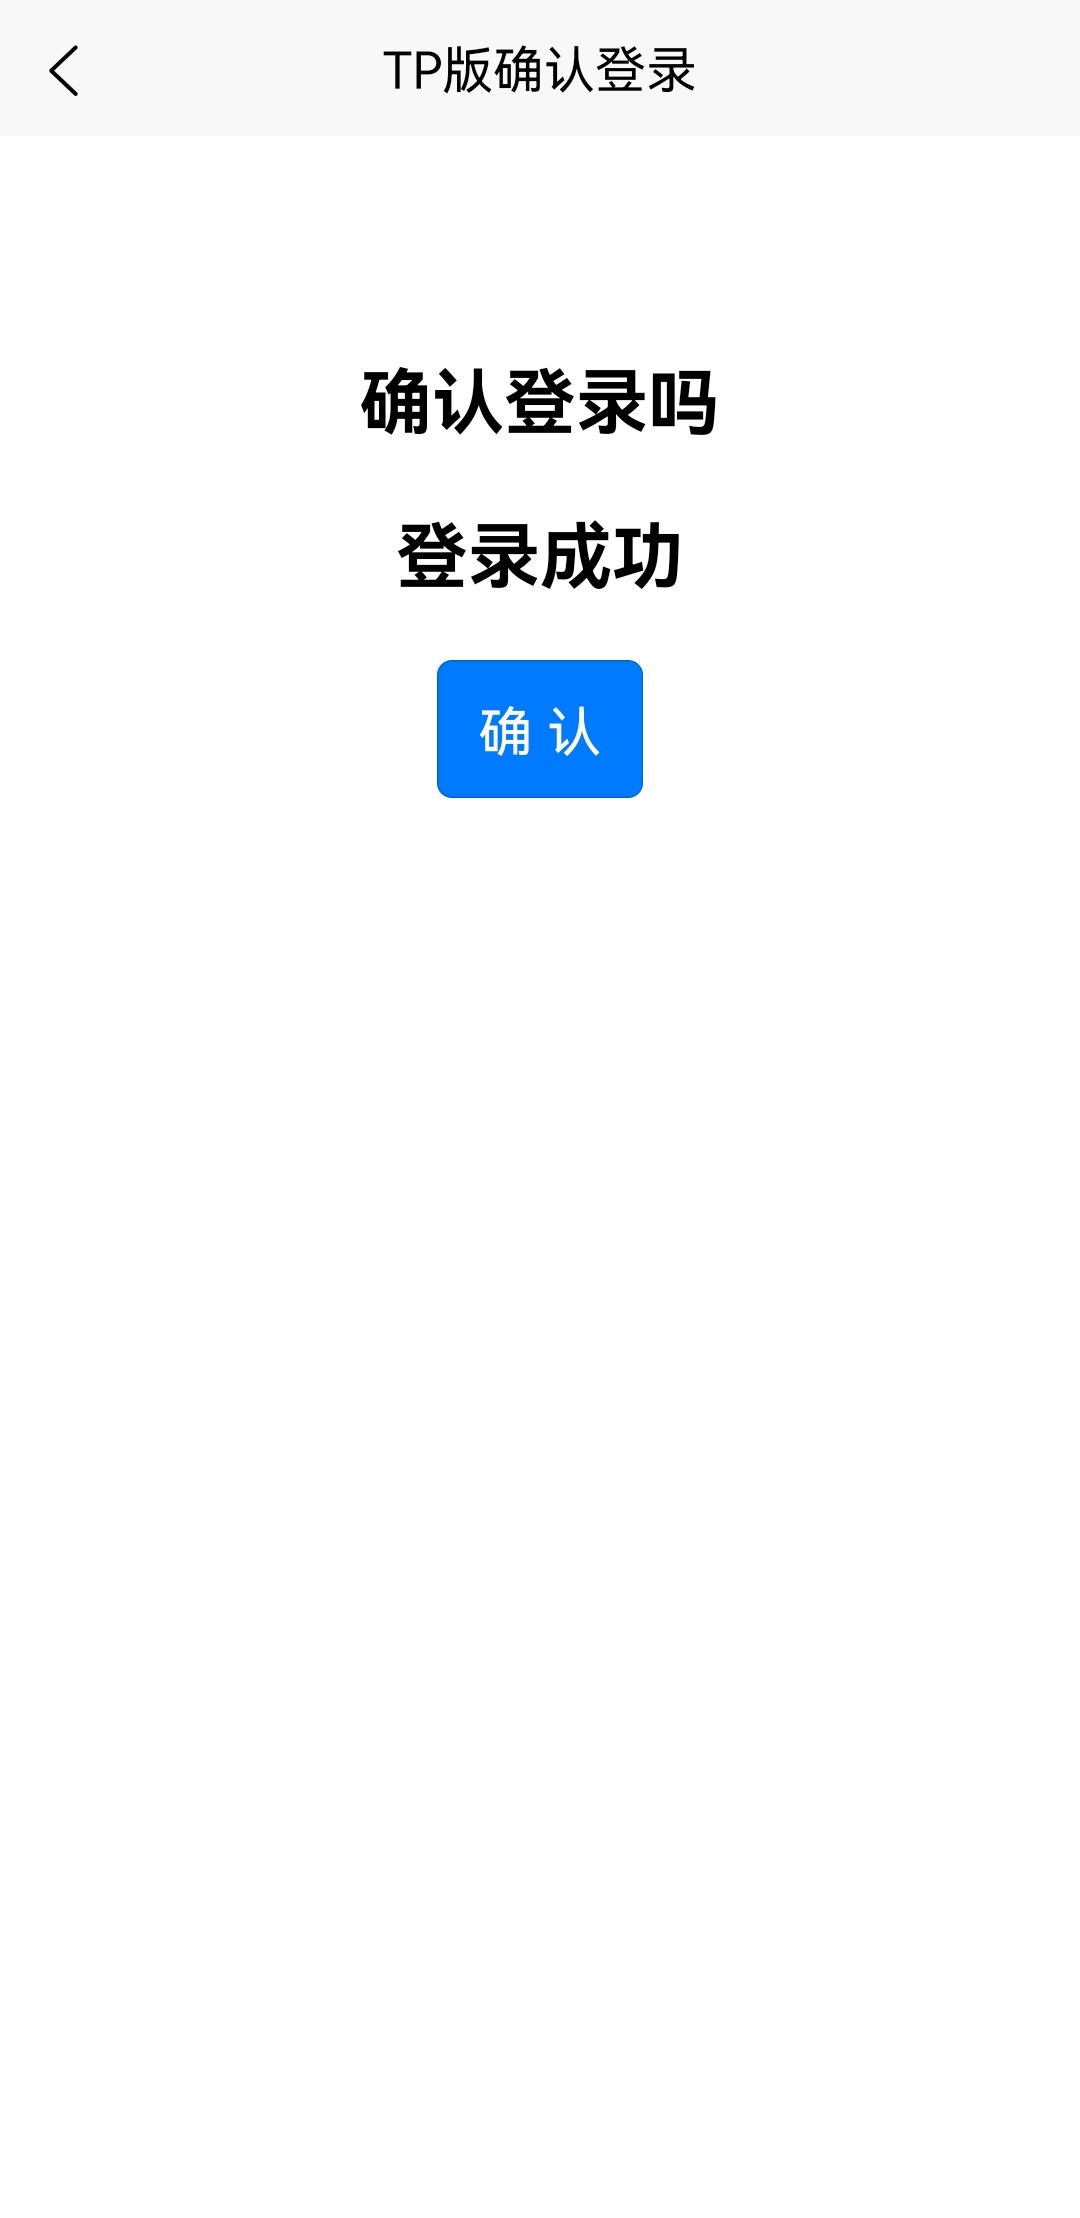 图6 图6 |
10、uni-app目录及源码分析
uni-app项目目录
├── common                                # 公共样式及类库
│   └── css
│       └── base64-pic-store.scss         # 兼容微信小程序图片显示
├── config
│   └── index.js                          # 项目配置文件
├── pages                                 # uniapp页面放置位置
│   └── index
│   │    └── index.vue                    # TP5.1版扫码登录页
│   └── login
│   │   └── login.vue                     # TP5.1版扫码确认页
│   └── my
│   │   └── my.vue                        # 我的页面
│   └── nindex
│   │   └── nindex.vue                    # Node版扫码登录页
│   └── nlogin
│       └── nlogin.vue                    # Node版扫码确认页
├── static                                # 存放应用引用的本地静态资源(如图片、视频等)的目录
├── uni_modules                           # 存放[uni_module](/uni_modules)
├── unpackage                             # 非工程代码,一般存放运行或发行的编译结果
├── App.vue                               # 应用配置,用来配置App全局样式以及监听 应用生命周期
├── main.js                               # Vue初始化入口文件
├── manifest.json                         # 配置应用名称、appid、logo、版本等打包信息
├── package.json
├── package-lock.json
├── pages.json                            # 配置页面路由、导航条、选项卡等页面类信息
└── uni.scss                              # 内置的常用样式变量
源码分析
common目录源码分析
为了兼容微信小程序图片显示,在common/css目录中设置 样式变量来显示图片,base64-pic-store.scss具体代码如下:
// 背景图base64编码
$background-base64-scancode: url(data:image/png;base64,图片base64编码);
// 背景图base64编码
$background-base64-confirm: url(data:image/png;base64,图片base64编码);
config 目录源码分析
为了项目的代码复用及优化,在config目录中index.js配置文件具体代码如下:
export default {
 baseUrl: 'http://192.168.116.156:3000' #替换成自己的url地址
}
pages目录源码分析
my目录源码
在my目录生成页面效果图如图一,其my.vue具体源码如下:
<template>
 <view class="center">
  <uni-sign-in ref="signIn"></uni-sign-in>
  <!-- 头像区域 -->
  <view class="userInfo" @click.capture="toUserInfo">
   <image class="logo-img" src="/static/ucenter/avatar.png"></image>
   <view class="logo-title">
    <text class="uer-name">心善志坚</text>
   </view>
  </view>
  <uni-grid class="grid" :column="4" :showBorder="false" :square="true">
   <uni-grid-item class="item" v-for="(item,index) in gridList" @click.native="tapGrid(index)" :key="index">
    <uni-icons class="icon" color="#2BC2E7" :type="item.icon" size="26"></uni-icons>
    <text class="text">{{item.text}}</text>
   </uni-grid-item>
  </uni-grid>
  <uni-list class="center-list" v-for="(sublist , index) in ucenterList" :key="index">
   <uni-list-item v-for="(item,i) in sublist" :title="item.title" link :rightText="item.rightText" :key="i"
    :clickable="true" :to="item.to" :show-extra-icon="true" :extraIcon="{type:item.icon,color:'#999'}">
   </uni-list-item>
  </uni-list>
  <text style="color:chocolate;font-size: 28upx;display: block;margin: 20upx;">说明:请使用对应的版本扫码相应的网页二维码</text>
  <button style="background-color:#2DC3E8;color: aliceblue;height: 80upx;font-size: 16px;margin-top: 16upx;margin-bottom: 20upx;border:2upx solid white;">退出登录</button>
 </view>
</template>

<script>
 import checkUpdate from '@/uni_modules/uni-upgrade-center-app/utils/check-update';
 import callCheckVersion from '@/uni_modules/uni-upgrade-center-app/utils/call-check-version';
 // #ifdef APP
 import UniShare from '@/uni_modules/uni-share/js_sdk/uni-share.js';
 const uniShare = new UniShare()
 // #endif
 export default {
  data() {
   return {
    gridList: [{
      "text": "考试",
      "icon": "compose"
     },
     {
      "text": "上传",
      "icon": "cloud-upload"
     },
     {
      "text": "收藏",
      "icon": "star"
     },
     {
      "text": "下载",
      "icon": "download"
     }
    ],
    ucenterList: [
     [{
       "title": "TP5.1版扫码",
       "to": '/pages/index/index',
       "icon": "scan"
      },
      {
       "title": "Node版扫码",
       "to": '/pages/nindex/nindex',
       "icon": "scan"
      },
      {
       "title": "系统设置",
       "to": '',
       "icon": "gear"
      }
     ],
     [{
      "title": "关于技术藤",
      "to": '',
      "icon": "info"
     }]
    ],
    listStyles: {
     "height": "150rpx",
     "width": "150rpx",
     "border": {
      "color": "#eee",
      "width": "1px",
      "style": "solid",
      "radius": "100%"
     }
    }

   }
  },
  methods: {
   toUserInfo() {
    uni.navigateTo({
     url: ''
    })
   },
   tapGrid(e) {
    uni.navigateTo({
     url: ''
    })
   }
  }
 }
</script>

<style lang="scss" scoped>
 page {
  background-color: #f8f8f8;
  height: 100%;
 }
 .center {
  background-color: #f8f8f8;
  height: 100%;
 }
 view {
  display: flex;
  box-sizing: border-box;
  flex-direction: column;
 }
 .center {
  flex: 1;
  flex-direction: column;
  background-color: #f8f8f8;
 }
 .userInfo {
  padding: 20rpx;
  padding-top: 50px;
  background-color: rgba(45, 195, 232, 0.5);
  flex-direction: column;
  align-items: center;
 }
 .logo-img {
  width: 150rpx;
  height: 150rpx;
  border-radius: 150rpx;
 }
 .logo-title {
  flex: 1;
  align-items: center;
  justify-content: space-between;
  flex-direction: row;
 }
 .uer-name {
  height: 100rpx;
  line-height: 100rpx;
  font-size: 38rpx;
  color: #FFFFFF;
 }
 .grid {
  background-color: #FFFFFF;
  margin-bottom: 6px;
 }
 .uni-grid .text {
  font-size: 16px;
  height: 25px;
  line-height: 25px;
  color: #817f82;
 }
 .uni-grid .item ::v-deep .uni-grid-item__box {
  justify-content: center;
  align-items: center;
 }
</style>
index目录源码
在index目录生成页面效果图如图一,其index.vue具体源码如下:
<template>
 <view class="scanCode">
  <h3 class="title">TP5.1+Redis+Workerman+Uniapp</h3>
  <button class="scan" type="primary" @click="scanCode">扫码登录</button>
 </view>
</template>
<script>
 export default {
  data() {
   return {
    uuid: null,
    StorageSync: null,
    timer: null
   }
  },
  onLoad() {},
  created() {
   this.setTime();
  },
  methods: {
   setTime() {
    this.timer = setInterval(() => {
     this.CheckAuthorization();
    }, 1000);
   },
   CheckAuthorization() {
    uni.request({
     url: '__URL__/index/Inquery_Web_Is_Logining', #替换成自己服务器地址
     method: 'GET',
     data: {
      uid: 1
     },
     success: (res) => {
      switch (res.data.status) {
       case 404:
        console.log(res.data.msg)
        break;

       case 200:
        clearInterval(this.timer)
        uni.navigateTo({
         url: ''
        });
        break;
       case 500:
        uni.showToast({
         title: res.data.msg,
         icon: 'none',
         duration: 2000
        });
        break;
       default:
        break;
      }
     }
    });
   },
   scanCode() {
    uni.scanCode({
     success: (res) => {
      this.uuid = res.result;
      uni.request({
       url: '__URL__/index/Sweep_Status', #替换成自己服务器地址
       method: 'GET',
       data: {
        uuid: this.uuid
       },
       success: (res) => {
        uni.navigateTo({
         url: `/pages/login/login?uuid=${this.uuid}`
        });
       }
      });
     }
    });
   }
  }
 }
</script>

<style>
 .scanCode {
  display: flex;
  flex-direction: column;
  align-items: center;
  justify-content: center;
  padding: 20% 0;
 }
 text {
  color: #8d8d8d;
  margin-top: 10px;
 }
 .scan {
  margin-top: 30px;
 }
</style>
login目录源码
在login目录生成页面效果图如图一,其login.vue具体源码如下:
<template>
 <view class="login">
  <h2>确认登录吗</h2>
  <h2 v-if="loginSuccess">登录成功</h2>
  <button type="primary" @click="submitLogin">确 认</button>
 </view>
</template>

<script>
 export default {
  data() {
   return {
    uuid: "",
    loginSuccess: false
   }
  },
  onLoad(option) {
   this.uuid = option.uuid;
  },
  methods: {
   submitLogin() {
    uni.request({
     url: '__URL__/index/login/index', #替换成自己服务器地址
     method: 'GET',
     data: {
      uuid: this.uuid,
      //APP登录后uid的值为uni.getStorageSync('userinfo').id
      uid: 1
     },
     success: (res) => {
      if (res.data.status == 404) {
       uni.showToast({
        title: res.data.msg,
        duration: 2000
       });
      } else {
       uni.showToast({
        title: "登录成功",
        duration: 2000
       });
       this.loginSuccess = true
       setTimeout(function(){
        uni.redirectTo({
         url:'/pages/my/my'
        })
       },2000);
      }
     }
    });
   }
  }
 }
</script>

<style scoped>
 .login {
  display: flex;
  justify-content: center;
  align-items: center;
  padding: 20% 0;
  text-align: center;
  flex-direction: column;
 }
 h2 {
  margin-bottom: 20px;
 }
</style>
11、总结
扫码登录实际上就是把移动端的登录状态同步到PC端,这个同步过程需要服务器进行校验和传递数据。扫码过程其实就是把PC的信息同步给移动端,从而能够让整个数据链路串联起来,如果PC展示一个url,移动端手动输入,也是可以实现的,但扫码的操作更便捷和安全。
需要指出的是,前面的讲的登录流程,它适用于同一个系统的PC端,WEB端,移动端。另外一种场景也比较常见,那就是通过第三方应用来扫码登录,比如极客时间/掘金都可以选择微信/QQ等扫码登录,那么这种通过第三方应用扫码登录又是什么原理呢?
本文作者:心善志坚
欢迎关注微信公众号“技术藤”

除特别注明外,本站所有文章均为技术藤原创,转载请注明出处来自https://www.jishuteng.com/article/28.html
 支付宝打赏
支付宝打赏
 微信打赏
微信打赏


参与评论 0条评论